Wednesday, June 15, 2011

wiww #4

It's that time of the week, where I show you lovelies what I wore...

I'm hooking up with Lindsey for fashion inspiration, which can be difficult to obtain at 28.5 weeks pregnant!

But I make the attempt! That's gotta count for something, right?!

This week is only one outfit as I was just too busy to stop for the camera.


White Top: Target Maternity
Sheer Top: Living Dolls {Marshalls}
Jean Crops: Motherhood
Flops: Gap
Necklace New: DailyChocolate
Headband New: DailyChocolate


I have to say, I am in.love with that sheer top! I was in Marshall's this past week looking for a new comforter and as I was walking to the register I saw it hanging there...calling my name! I just had to get it. It's so fun and light, so I can add layers without killing myself from the heat!

Plus, the color and lace just make me swoon!

 
What is your favorite recent clothing purchase?

Tuesday, June 14, 2011

How-To Tuesday :: Fabric Bookmark

A few weeks ago I saw this great tut from Little Birdie Secrets on how to make fabric bookmarks.

My plan was to make them as gifts. I tried making one, and it turned out great! I went to make the others and my sewing machine was not working! {Fail!} So, I had to make other options...but I did get one made. And yes, I kept it for myself!

The tut is so easy with minimal sewing!! My kind of project!


So, to get started, you will need:


*Fabric cut to 4" x 8"
*Fusible interfacing cut to 3.75" x 7.75"
*Fabric strip for flower cut to about 1.25" x 42"
*Coordinating thread and sewing machine
*Fabric glue
*Coordinating button
*Needle and thread

1. Following manufacturer's instructions, iron fusible interfacing to wrong side of fabric piece.


2. Fold fabric piece in half width-wise, right sides together.


3. Sew across bottom edge and up side edge.


4. Clip corners and turn inside out. Use a pencil to gently push out corners.


5. Fold ends of open end in about 1/2".


6. Top stitch around all four sides, close to the edge, closing up open end.


7. Create a fabric rosette with your long strip of coordinating fabric and fabric glue (see tutorial here). Hand sew a button in the middle.


8. Glue the fabric flower to the top of the bookmark with fabric glue. That's it!


{This tut was taken from their website. Directions and pics belong to Little Birdie Secrets.}

I followed these directions completely and had no issues. I just love when that happens!

Here is the bookmark I made


As soon as my sewing machine is repaired, I plan on making several more. They will be very handy for the several books I am reading this summer.

Check out Little Birdie Secrets for more great tutorials!

You Rock :: Sale

You guys rock! No, truly and totally, you all rock!!

Thanks for being so patient with my shop update posts. I have a tutorial coming up for you today, so check back later

Just a quick {but wonderful} shop update this morning, to let you all know that you are awesome and I heart you all!


And because I appreciate you oh so much, I have a special offer, for you!

Now through midnight, take an extra 10% off anything and everything in the shop. Even items in the clearance section! Just use coupon code HAPPYDAY when checking out.

I just added some new items last night, and those are included as well! Yay!!

So, don't forget to come back for a fun tutorial, and, Happy Shopping!!

These make great gift items as well, packaged sweetly and ready for the giving.

Monday, June 13, 2011

Birthday Crowns

As mentioned in a previous post, I am in the process of clearing out my inventory to make room for some new, exciting goodies!

I just added the Birthday Crowns in the shop today. They were a special boutique item, never before offered online. I have only a few left and have marked them down just for you!

These are a great way to let everyone know, it's your day! They are also precious for a 1st Birthday Party!

Don't forget, there are still some great goodies marked down to great prices...and they make lovely gifts!


Other items will be added to the Clearance section of the shop this week as well as new product! So be sure to check back often!!

What items would you love to see more of?

Party Hats :: Barbie


A few days ago, my sweet little lulu and I were looking on etsy {because even at 5 she can appreciate the beauty} and on the front page we saw a listing for Barbie sized party hats!

What 5 year old little girl could resist the beauty of those?! And what 5 year old little girl wouldn't want to have them for her very own!?

Certainly not my little 5 year old!

She ran straight for my craft closet and picked out her favorite paper and said "Here Momma, we can make some!"

And that is just what we did. And we had so much fun.


We invited some of her Barbies to a party where they were outfitted with cute hats, and were able to try a new recipe of raspberry cake and strawberry cupcakes.


I just love that she loves to play with barbies. I never outgrew them! I still love to play with them, but I mostly love accessorizing them. :]

What was your favorite thing to play with when you were little?

Thursday, June 9, 2011

Handmade Feature Thursday

It's very rare that I come across a shop who's product makes my heart skip a beat.

Today, I found a shop that made made me do just that!

She makes the most gorgeous bags and I am just so smitten with the colors!!


I am so in love!


Just look at those colors! My personal fav is the "sea glass" {the blue one}

There are so many cute things in her shop, but I am really needing/wanting this bag! I could totally rock it as a diaper bag!!

Go check it out, you may find something you can't live without!

Tuesday, June 7, 2011

Out With the Old...In With the New

As many of you know, and can see in my sidebar, I have an Etsy shop. I also do several shows throughout the year, offering custom original pieces not offered online.

Recently, I have been working on new product {and can't wait to offer it to you}.

I want to clear out my inventory.

Make it fresh and new. I am really, very anxious to offer this new product to my you, my wonderful customers.

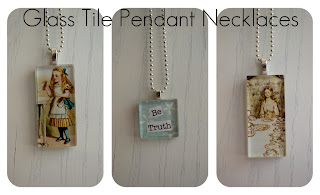
But before I can do that, I really must clear out what I no longer intend to offer. I have a few things left from my last show, plus other items that have never been offered online {including darling pendant necklaces for little girls}.

Today and throughout the week, I will be adding those items to my Etsy shop, at HUGE discounts. I need these items out of my inventory. They make perfect gifts, for yourself, for Christmas {it's never too early to start}, birthdays, hostess gifts, bridesmaids, just because!

I will be adding the items to the "clearance" section of my shop. Once they are sold, that is it. No more. Nada, zip, zilch.

So get them while you can! And remember, an item does not belong to you until it has actually been paid for. Even though it sits in your cart, someone else can still purchase it.

Here is a snippet of what will be marked down and no longer offered:

Glass Tile Pendants $14, now $7
Rosebud Stud Earrings {Some Colors} $10, now $5
Rosebud Dangles {Some Colors} $12, now $6
Fabric Peonies $12, now $8
Birthday Crowns $22, now $15 {These were a custom show piece}


Remember to keep checking in this week as new clearance items will be added daily!

Next week I will be introducing some of the new product. I am so excited!! I think you all will really love it!

And also, a HUGE thank you to all my wonderful customers who support my little handmade biz. I {heart} each and every one of you!

Thursday, June 2, 2011

Fabric Tape :: How To

I have had my eye on some seriously delicious Japanese washi tape... but haven't really wanted to make the commitment just yet. I figured I could probably make my own, which is always a crafter's state of mind. We see something we like, and just know we can make it ourselves. Or am I the only one?? Maybe, but at least you all get to benefit from some of my "Icanmakethatmyself" ideas! Score!!

So here is how I made my fabric tape. And I love this, because you can use whatever fabric you like!

Supplies needed:

Fabric of your choice
Xyron Sticker Maker {$10 at Walmart or craft stores}
Scissors


Cut your fabric to the desired width, or the width allowed by your sticker maker.

Insert fabric into sticker maker, and pull through.


Viola! You now have beautiful fabric tape.


You can use this to adorn packages, gift bags, gift wrap, or as embellishments for scrapbooking and card making. It could also be added to home decor DIY projects!


The only problem you'll find with this project is, you can't seem to make enough! I have made so much already, and still I can't stop. It's fun, easy, and so much cheaper than buying it online.

If you decide to make some, I'd love to see how you use it! Send me an email with your project, or upload it to the ODC flickr pool! The flickr pool is new, I thought it would be a fun way to share projects with each other and get inspiration!

Tell me, what would you use fabric tape for?

Wednesday, June 1, 2011

wiww #3

Last week was spent with my family {and hubbies entire family} at Topsail Beach in NC. It was a wonderful time of sun, warmth, ocean, and family. I miss them all already!

I didn't get many shots of myself this past week, as most of the time I was in a bathing suit...and trust me, no one wants to see that!

So, for a little bit of summer fashion inspiration, maternity style, here it is!


Dress: Old, from Target
Cardi: Old, from Target
Necklace: 31 Bits...again!
Earrings: Daily Chocolate


Hubbie outfit
Top: Target
Shorts: Lands End
Super Gorgeous Beard: A gift from God!!


I changed my outfit for this pic as we were going out to celebrate our anniversary!

Dress: Old Navy, Maternity
Cardi: Target
Necklace {that that I put on just before walking out the door}: Daily Chocolate

Our Family Pic
Son's outfit: Top: Children's Place, Bottoms: Kohls
Daughter's outfit: Top and Skirt: TJ MAXX, Headband: GroopDeals

Now go head on over to The Pleated Poppy, get some inspiration, and let those who inspire you know it!!